In this tutorial, we will show you how to unlock the bootloader on any Android device via the Fastboot method. While the concluding steps might be the same for all devices, the route taken to that step is slightly different. Unlock Bootloader and Fastboot Method on Android. There might be a few extra requirements that your OEM might have added to this unlocking process. In that case, you will have to go through those prerequisites before you proceed ahead with the required steps. Here is everything you need to know in this regard. Unlock Bootloader and Fastboot Method on Android.
Of all the major perks that the Android ecosystem boasts of, there isn’t a shadow of a doubt that its open-source nature stands right at the pinnacle. Opening the gates to a plentitude of customizations, users are generally spoilt for choices. For the general users, a simple visit to the Play Store might suffice most of their needs. For example, they could install various custom launchers, themes, icon packs, wallpapers, and ringtones. Well, if that is not enough, they could even sideload their preferred apps onto their devices. But all these are just the tip of the iceberg.
These are just some of the customization opportunities that we have mentioned here, there exist a plethora of more such tweaks. However, for each of the above modifications, there exists an important prerequisite that needs to be met. And that is your device should be having an unlocked bootloader. So if you ready to try out these tweaks, then here are the required instructions on how to unlock bootloader on any Android device via the fastboot method. Follow along.
What is a Bootloader:
The first question that might come to your mind is what exactly is a Bootloader on Android. According to Google, “A bootloader is a vendor-proprietary image responsible for bringing up the kernel on a device”. Well, this is too much to digest. In simpler terms, you might consider bootloader to be a software program that determines what all programs your device needs to boot at the startup.
It also helps the device to boot into the bootloader mode. Similarly, every Android device comes with a few partitions, including boot, recovery, system, data, vendors, among others. The Bootloader is a safety mechanism for these partitions, making sure that the integrity of these partitions remains intact and there aren’t any modifications made to them.
What is an Unlocked Bootloader:
The bootloader is a guardian to all the device partitions and hence will make sure that there aren’t any tweaks done to any of these partitions. It has to make sure that you are using the genuine software program shipped in by the device manufacturers. However, here is the thing. Not every user is a fan of this default OS. The reason for the same could be aplenty. For example, they might not like the UI, are against the notion of in-device ads, or the tons of incorporated bloatware apps might be bugging them.
The reasons could be aplenty, but thankfully the solution is only one- an unlocked bootloader on your Android device. As soon as you do so, the system would no longer place any restriction on the depth of customizations that you could achieve. Just at the boot time, you might get a bootloader unlocking warning message, but that is it. There would be no limitation in enjoying the benefits that an unlocked bootloader brings with itself. But what are these benefits in the first place? Let’s check it out.
Advantages of an Unlocked Bootloader:
Once the bootloader on your Android device is unlocked, you could install a custom recovery like TWRP. This in turn will give you the option to install mods, wipe various device partitions, take a Nandroid backup, install files via ADB, and plenty more. Furthermore, if the device bootloader is unlocked, you could install many popular custom ROMs including LineageOS, HavocOS, Pixel Experience. Not only does this give your device a fresh new outlook, but it could also upgrade the device’s Android version, even if officially it is no longer slated for the upgrade.
Risks with Unlocked Bootloader:
There are quite a few risks associated with an unlocked bootloader. To begin with, your device is now more prone to attacks. Furthermore, your OEM might even make the device’s warranty void and null. Likewise, some banking apps like Google Pay and games like Pokemon GO might not function correctly. Similarly, you will be degrading the Widevine Certification from L1 to L3, this will lead to you not being able to view Netflix contents in HD. The process in itself is pretty dangerous and might brick your device or send it to bootloop if not done correctly.
So by now, you are aware of all the perks and the caveats. If you are ready to proceed then follow the below steps to unlock the bootloader on any Android device via fastboot method.
How to Unlock Bootloader via Fastboot Method on Android:
Before we begin the unlocking of the bootloader, let us take a deep look at what is a bootloader and what advantages or disadvantages you get, once you unlock it;
Warning:
Before we begin with the unlocking of bootloader, I would strongly recommend you to create a backup of your device storage and all your files stored on your device. Unlocking of bootloader will wipe off the entire data on your device. Moreover, it is advised to follow the steps mentioned in this post very carefully to avoid permanent damage or bricking of your device. If anything goes wrong the author or GetDroidTips are not responsible for it.
To make the entire unlocking process easier to understand, we have broken it down to simpler steps. Follow along.
Step 1: Backup your Device:
First off create a backup of your entire Android device. This is because the process will erase all the data from your device.
Next up you will also have to enable OEM unlocking and USB Debugging. The former is required for unlocking the process. The latter will help in establishing a successful ADB connection between your device and PC. The option to enable both of them is present inside Developer Option, which itself is hidden. Here is how to enable both of them.
- Head over to Settings on your Android device.
- Go to About Phone and tap on Build Number 7 times
- Head back to Settings, tap on System followed by Advanced.
- The Developer Options should now be visible. Within that, enable the toggle next to USB Debugging and OEM Unlocking.
STEP 3: Install Android SDK Platform Tools:
You also need to install the ADB and Fastboot binaries on your PC. This is needed to execute ADB and Fastboot commands between your PC and Android device. So go ahead, download and install the Android SDK Platform Tools on your PC.
STEP 4: OEM Specific Prerequisites:
While Pixel Nexus and Android One devices make it pretty easy when it comes to unlocking process, some OEMs like HTC, Nokia, Motorola, HTC among others requires a unlock token, specific codes or even a specific file. You will have to complete these requirements before beginning the unlocking process via the fastboot method. You could take the help of the below links, follow their instructions, and proceed with the next step afterward.
STEP 5: Boot Device to Fastboot/Bootloader Mode:
- You will now have to boot your device to Fastboot/Bootloader mode. Follow the below steps for that:
- With USB Debugging and OEM Unlocking enabled, connect your device to PC via USB cable.
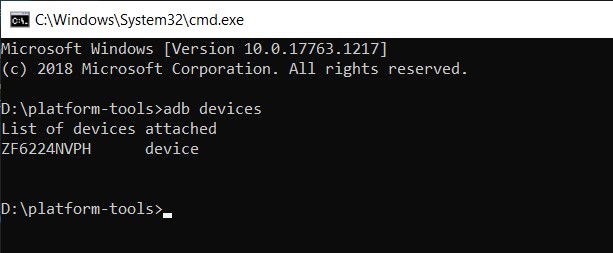
- Head over to the platform-tools folder, type in CMD and hit Enter. This will launch the Command Prompt.
- Execute the below command in the CMD window to make sure that the device has been successfully connected to the ADB mode:
adb devices
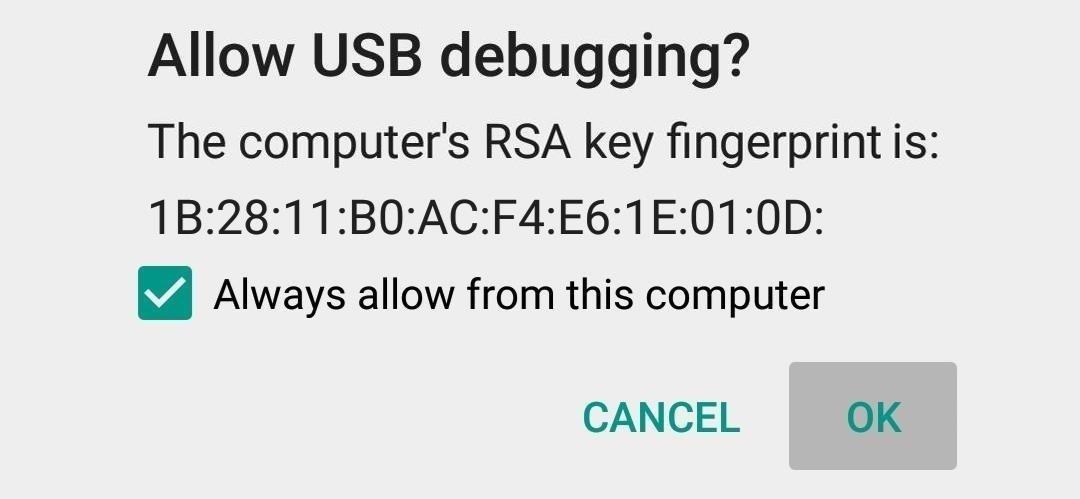
- As soon as you do so, you will get an Authorize USB Debugging prompt on your device. Tap on OK. Furthermore, if you are carrying out these steps on your setup, you could tick-mark the Always allow from this computer option as well.
- Next up, enter the below command to boot your device to Fastboot or Bootloader mode:
adb reboot bootloader
- Now proceed with the below instructions to finally unlock the bootloader your Android device via fastboot method.
STEP 6: Unlock Bootloader:
-
- Now comes the important part. If you are having a device from Google Nexus, Pixel or any other OEM launched in 2015 or later, then enter the below fastboot command to unlock the bootloader. Do keep in mind that the below command will wipe off all the data.
fastboot flashing unlock
- On the other hand, if your device was launched before 2015, then the below command will come in handy:
fastboot oem unlock
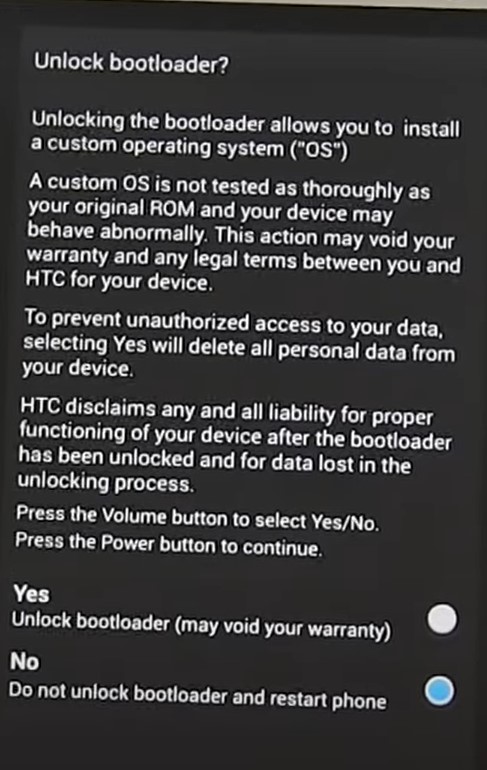
- At this point, you should see a confirmation message on your device. Use the Volume keys to select the Unlock the Bootloader option and hit the Power button to confirm your decision.
- Now the process will take only a few seconds. After which your device will boot to the bootloader or system. If it boots to OS, well and good, otherwise use the below code to do so
fastboot reboot
- That’s it. These were the required steps to unlock the bootloader on your Android device using the fastboot method.
- Now comes the important part. If you are having a device from Google Nexus, Pixel or any other OEM launched in 2015 or later, then enter the below fastboot command to unlock the bootloader. Do keep in mind that the below command will wipe off all the data.
Concluding:
Do keep in mind that the first boot will take some time, this is completely normal. Another thing worth mentioning is the fact that even if your device was launched after 2015, it might still follow the earlier fastboot oem unlock command. So if the fastboot flashing unlock command throws up error in your case, you should try out the former one.
Furthermore, you will also see the Unlocked Bootloader warning message after every boot, again nothing to worry about. When your device boots, you will have to sign in with your Google account as the device has been wiped.
![Download Fcrypt Disabler For Android 10,11,12,13 Devices [Updated 2022] 6 Fcrypt Disabler v3](https://thecustomrom.com/wp-content/uploads/2021/07/Fcrypt-Disabler-v3.jpg)


![Install a Custom ROM on Android Using Recovery [Updated 2021] 9 maxresdefault](https://thecustomrom.com/wp-content/uploads/2020/07/maxresdefault-768x432.jpg)
![Unlock Bootloader on Any Xiaomi Devices Using Mi Unlock Tool [Updated 2021] 10 Mi bootloader unlock](https://thecustomrom.com/wp-content/uploads/2020/12/Mi-bootloader-unlock-768x477.jpg)